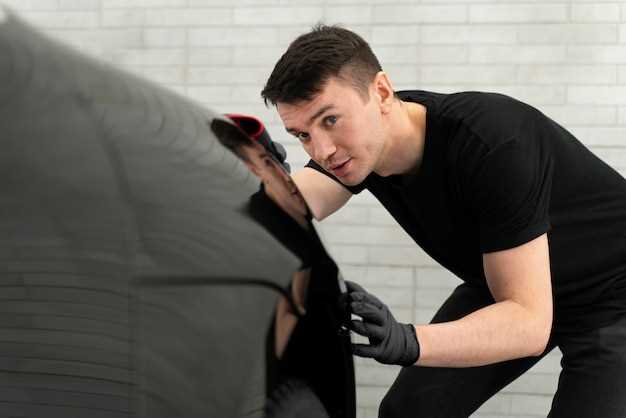
Capturing stunning images of custom cars requires careful planning and execution both before and after the photography session. Understanding the nuances of lighting, angles, and composition can make a significant difference in the outcome of your photos. This article aims to provide you with essential tips to enhance your car photography, ensuring that your images stand out for their clarity and artistic value.
Before the session begins, take the time to scout your location thoroughly. Consider the time of day and how natural light interacts with the car’s curves and colors. Experimenting with different backgrounds and settings can greatly influence the overall mood of your photographs. Additionally, prepare your equipment in advance; check your camera settings, lenses, and accessories to ensure everything is in working order.
After the shoot, the work doesn’t just end with taking the pictures. Post-processing plays a crucial role in elevating your final images. Adjusting contrast, saturation, and sharpness can help highlight the unique features of the custom car, bringing it to life in your photos. Don’t hesitate to experiment with editing techniques to create a distinctive style that resonates with your vision and showcases the beauty of the vehicle.
Preparing Your Car for a Photoshoot: Essential Steps
To achieve stunning results in your car photography session, it’s essential to ensure your vehicle is perfectly prepared before the shoot. The first step is to thoroughly wash and detail the car. Remove any dirt, grime, or old wax to ensure the paint reflects light beautifully. Utilize a high-quality car wash soap, and don’t forget to clean the wheels and tires, as they significantly contribute to the overall appearance.
After washing, inspect the vehicle for imperfections such as scratches, chips, or small dents. If you notice any blemishes, consider polishing them out or applying touch-up paint to achieve a flawless finish. A clean and polished car looks more attractive in photographs, enhancing the overall visual appeal.
Next, focus on the interior. Clear out any personal items and trash. Vacuum the seats and carpets, and wipe down all surfaces with a microfiber cloth to eliminate dust and fingerprints. A well-maintained interior creates a cohesive look that complements the exterior shots.
Consider the tire shine, as well. Applying tire dressing can give the rubber a deep, rich appearance, elevating the look of your car in photographs. Ensuring that the tires are adequately inflated not only enhances safety but also improves the car’s stance in images.
Before the session, think about the setting. Choose a location that complements the style of your custom car. A scenic backdrop, whether urban or natural, can add depth and interest to your images. Ensure that the lighting conditions are optimal; early morning or late afternoon provides soft, diffused light that enhances colors and reduces harsh shadows.
Finally, communicate with your photographer about any specific shots or angles you envision. This collaboration can help capture your car’s unique features beautifully. Preparing your car meticulously not only enhances well-being during the shoot but also ensures striking outcomes in the final photographs.
Choosing the Right Location for Maximum Impact

When planning your car photography session, the location plays a crucial role in enhancing the overall appeal of your images. Selecting the right backdrop can transform an ordinary photograph into a stunning visual story. Before finalizing your spot, consider a few key factors that can contribute to achieving maximum impact.
Firstly, think about the theme you want to convey. Urban settings, such as city streets or industrial areas, create a modern vibe, while natural landscapes provide a more serene and timeless feel. Research the locations around you to find places that complement your car’s aesthetics and style. After identifying potential spots, visit them at different times of the day to observe how lighting conditions change the scene. Golden hour, just after sunrise or before sunset, can add a magical quality to your images.
Another important factor is accessibility and safety. Ensure that the location is easy to reach and doesn’t pose any risks during your shoot. Some areas might require permits or permissions, especially in public spaces. Always check local regulations before proceeding to avoid any disruptions. After securing your location, scout the area for interesting angles and compositions that can highlight the car effectively.
Finally, consider how the surroundings can enhance the car’s features. Look for contrasting elements that can make the vehicle pop, such as colorful murals, sleek architecture, or vibrant nature. Incorporating these elements into your composition can create a visually striking image that captures attention. Before you start the session, visualize how you can frame your shots to utilize the background effectively while ensuring the car remains the focal point.
Ultimately, the right location can elevate your car photography, making your shots more impressive and engaging. Take the time to plan accordingly, and you’ll see a remarkable difference in your final images before and after the session.
Post-Processing Techniques to Enhance Your Car Images

Post-processing is essential in car photography to elevate images from ordinary to extraordinary. The right techniques can dramatically transform your photos, making them more visually appealing and professional.
Before diving into specific techniques, it’s crucial to understand the importance of a good raw image. The details captured during the shoot will significantly influence how effectively you can enhance the photos during editing. Here are some key post-processing techniques to consider:
1. Color Correction: Adjust the colors to ensure they accurately represent the car’s paint and surroundings. Use tools to correct any color casts that may have occurred during shooting. Focus on enhancing the vibrancy of the car’s color while keeping it realistic.
2. Contrast and Exposure: Play with contrast levels to make the car stand out against the background. Increasing contrast can bring out details in the shadows and highlights, emphasizing the car’s lines and curves. Ensure the exposure is balanced for optimum clarity.
3. Sharpening: Apply sharpening to bring out the details of the car’s texture and features. Be cautious not to overdo it; excessive sharpening can create noise and artifacts that detract from the image’s quality.
4. Background Blurring: If the background distracts from the car, consider using a blur effect. This technique can help direct the viewer’s focus toward the subject and ensure the car is the main attraction in the frame.
5. Highlights and Shadows Adjustment: Refine highlights and shadows to enhance the depth of the image. Bringing down highlights can recover details lost in bright spots, while lifting shadows can reveal more texture and richness in darker areas.
6. Use of Filters: Experiment with filters to add mood and character to the images. Black and white filters can create a classic look, while vignette can subtly draw attention to the car.
7. Retouching: Remove any distracting elements from the scene that could take attention away from the vehicle. This includes blemishes, reflections, or unwanted objects that were not apparent during the shoot.
After applying these techniques, always take a step back and evaluate the overall composition. Compare the edited version with the original to ensure that the enhancements are not overpowering the essence of the car. The goal is to create stunning imagery that feels polished and inviting.


