

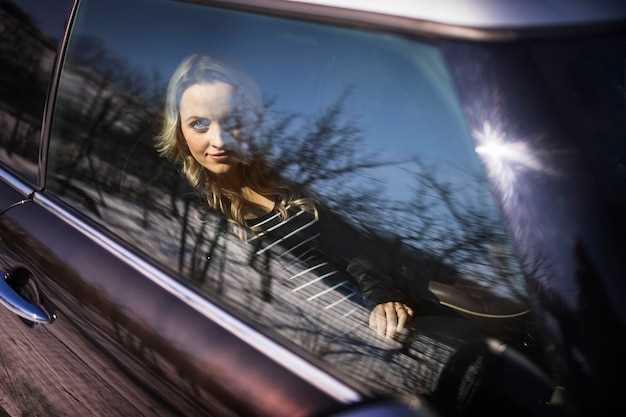
Capturing stunning daylight car event photos is an art that many photographers strive to master. The natural light available during the day provides a unique opportunity to highlight the beauty and intricate details of vehicles. However, even the best shots can benefit from thoughtful editing techniques that enhance their overall impact. In this article, we will explore essential editing methods specifically tailored for daylight photography of car events.
When photographing cars in daylight, lighting conditions can vary significantly throughout the day. To make the most of these conditions, photographers must understand how to adjust brightness, contrast, and color balance during the editing process. This not only helps bring out the vibrant colors of the vehicles but also creates a more balanced composition that draws the viewer’s eye.
Additionally, the use of selective editing techniques can be particularly beneficial. By emphasizing certain areas of the photo while softening others, you can guide the viewer’s attention to the car itself. Techniques such as sharpening and enhancing details become vital in ensuring that the vehicle stands out against its background. Whether you are a seasoned pro or an amateur enthusiast, mastering these editing techniques will elevate your daylight car event photos to the next level.
How to Adjust Brightness and Contrast for Optimal Car Visibility
When editing daylight car event photos, achieving the right brightness and contrast is essential for highlighting the vehicle’s details. Proper adjustments ensure that the car stands out against its surroundings, making it the focal point of the image.
Begin by assessing the overall brightness of your image. In bright daylight, photos can often appear washed out due to excessive light. Use the brightness slider in your editing software to reduce the overall brightness if the car appears pale or lacks detail. Aim for a balance that preserves highlights without losing essential features of the vehicle.
Next, consider adjusting the contrast. Increasing contrast will enhance the difference between the car and the background, making the vehicle pop. Be cautious, as overly high contrast can lead to loss of details in both shadow and highlight areas. Gradually increase the contrast until you find the right level that enhances the car’s lines and colors without compromising the overall image quality.
It is helpful to utilize histogram tools during this process. A well-balanced histogram indicates that both shadows and highlights are adequately represented. If the histogram is skewed, it suggests areas that may need further adjustment. Ensure to monitor these changes, especially when editing images taken under harsh sunlight.
Finally, fine-tune the edits by adjusting individual color channels. This can help in achieving richer tones and ensuring the car’s color looks true to life. Follow these steps for optimal visibility and a professional finish that highlights the magnificence of the car in daylight conditions.
Tips for Enhancing Color Saturation in Natural Light Conditions
Natural light can present unique challenges and opportunities when capturing car event photos. To enhance color saturation effectively, consider the following tips during your edits.
First, use the HSL (Hue, Saturation, Luminance) adjustment tool in your editing software. This allows you to selectively modify the saturation levels of specific colors without affecting the entire photo. For instance, increasing the saturation of reds can make the car’s paint pop, while keeping blues and greens in check can maintain a balanced look.
Next, explore the vibrance adjustment feature. Unlike saturation, vibrance adjusts colors in a more subtle manner, prioritizing the less saturated colors first. This technique can help maintain skin tones and other delicate details while enhancing the vividness of other elements in your photo.
Additionally, consider adjusting contrast. Increasing contrast can enhance the perceived saturation of colors, making the image appear more vibrant. Be cautious, though; too much contrast can lead to loss of detail in highlights and shadows.
Using layers can also be beneficial. By duplicating your photo layer, apply a saturation boost to the new layer and then adjust its opacity. This allows you to control the intensity of the saturation effect, blending it seamlessly with the original layer.
Finally, take advantage of color grading techniques. Applying a color grading filter can infuse interesting hues while simultaneously enhancing saturation across the image without compromising the overall aesthetic. Experimenting with color wheels can lead to unique and striking outcomes.
Applying these edits with focus and creativity can significantly improve color saturation in your daylight car event photos, resulting in images that are both vibrant and true to life.
Best Practices for Removing Distracting Background Elements
When editing photos from daylight car events, it’s crucial to ensure that the focus remains on the vehicle rather than surrounding distractions. Here are some best practices to effectively remove unwanted background elements while maintaining a high-quality image.
First, use a high-resolution photo as your starting point. A clear image allows for more precise edits and helps avoid pixelation when elements are removed. Tools like Adobe Photoshop or Lightroom provide advanced tools for editing that can assist in this process.
Next, employ selection tools such as the Lasso Tool or the Pen Tool to carefully outline the distracting elements you wish to eliminate. A precise selection ensures that nearby areas are not unintentionally affected. After making your selection, use the Content-Aware Fill feature, which allows for intelligent replacement of the selected area with surrounding textures and colors.
For larger distractions, consider using the Clone Stamp Tool. This tool lets you sample an area of the photo and paint over the unwanted elements. Adjust the opacity and softness of the brush to create a seamless transition between edited and unedited areas, maintaining the natural look of the background.
Additionally, pay attention to the edges of the car when removing background elements. Softening the edges where the car meets the background can enhance the overall composition and make the edit less noticeable. This step is crucial for blending the vehicle into its new background setting seamlessly.
Finally, consider adding a subtle vignette effect around the edges of the photo after removing distractions. This technique draws attention back to the car and provides a polished finish to the image, ensuring it stands out in any daylight event context.


